Installing a downspout hinge is simple, but safety is key. Use a stable ladder on level ground and wear gloves and safety glasses to protect against sharp edges and debris. Check for hidden hazards like wires before drilling, and use the proper tools for a secure fit. Hold the downspout firmly during installation to prevent sudden movement, and always follow the manufacturer’s instructions. Taking these precautions ensures a safe and effective installation that enhances your drainage system and makes yard maintenance easier.


Tools Required: Tin Snips, 8 Zip Screws*, 1/4” Hex Bit and a Drill (*Zip screws are not included)
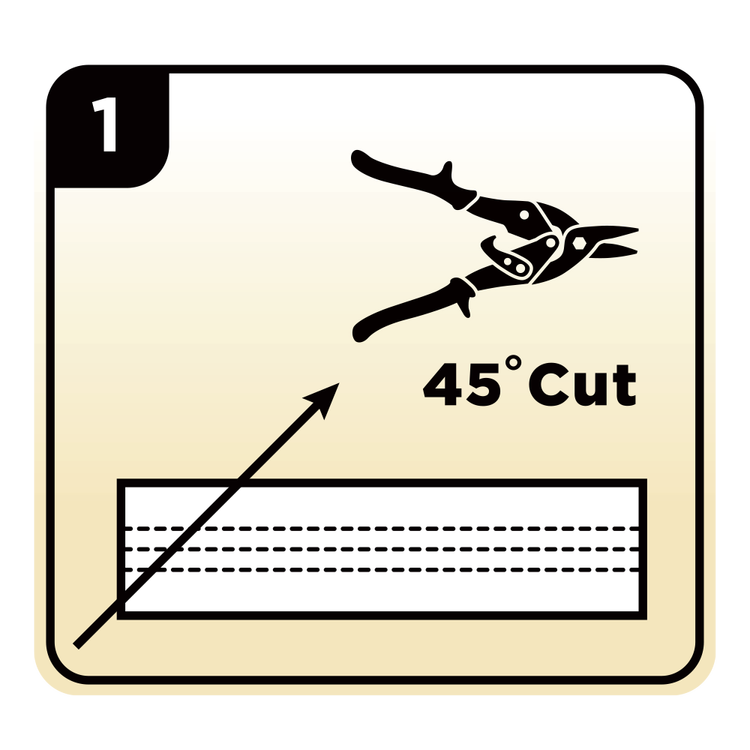
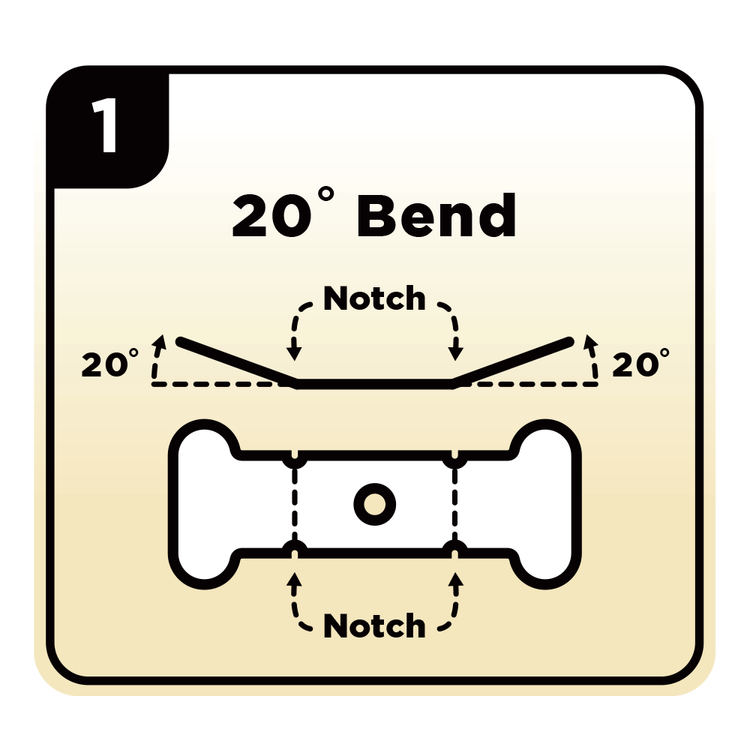
Step 1
Using tin snips, cut out a 45-degree angled section of the downspout extension.
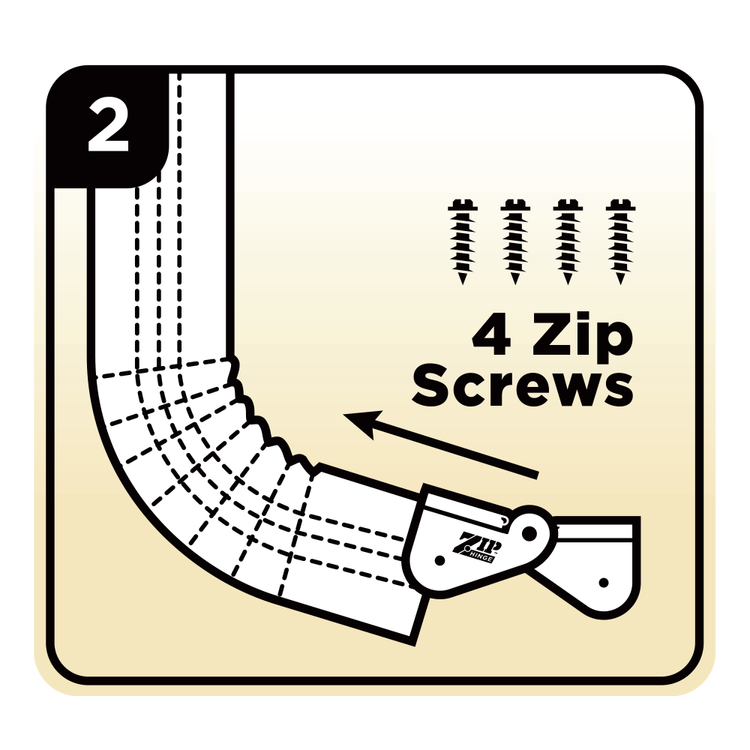
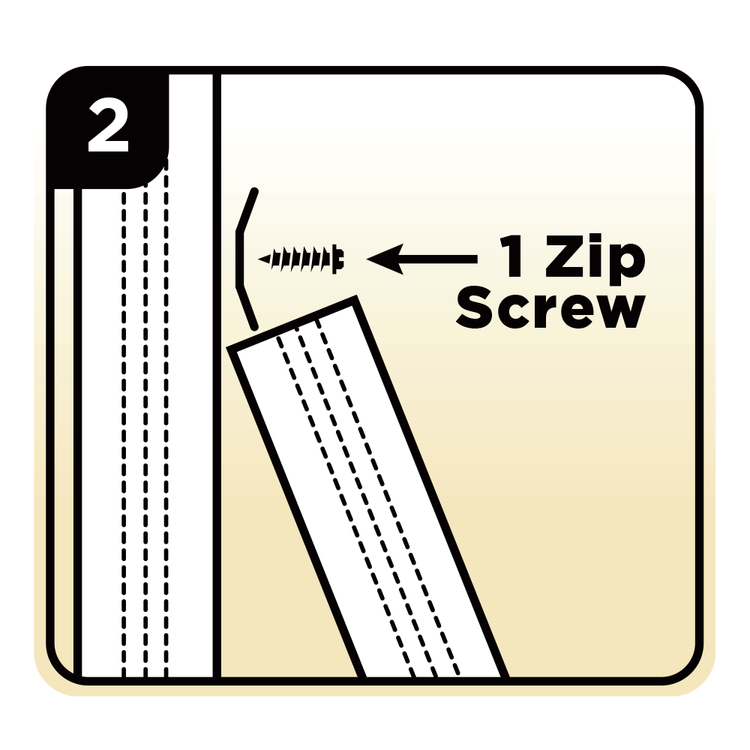
Step 2
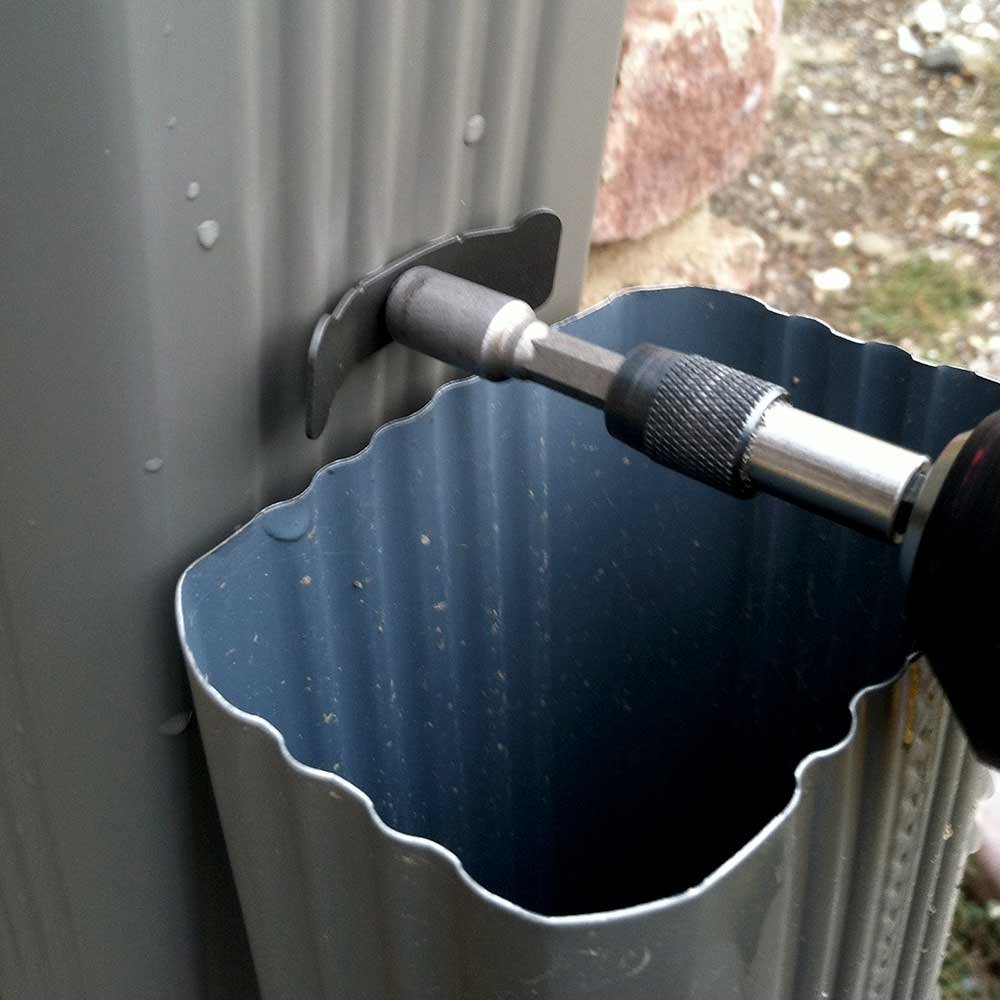
Slide the Zip Hinge onto the elbow of the downspout and secure it with zip screws. Make sure the Zip Hinge is fully seated before attaching.
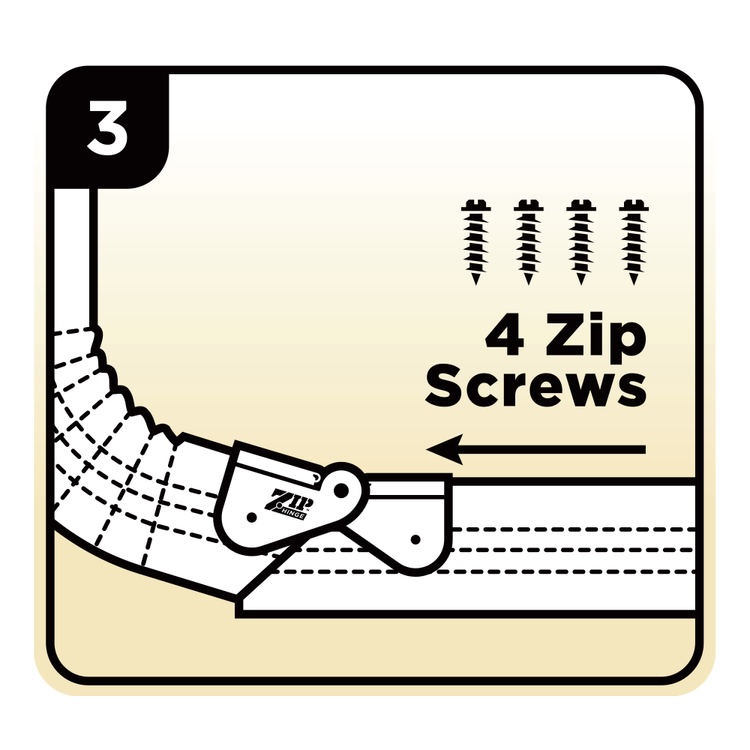
Step 3
Slide the cut section of the downspout extension into the Zip Hinges and secure with zip screws. Make sure the downspout is fully seated before attaching.
Optional Clasp Installation Instructions
Step 1
Bend the clasp at notches to approximately 20 degrees.
Step 2
Use a zip screw or 1/8” rivet to attach the clasp 3/4 inches above raised downspout extension.
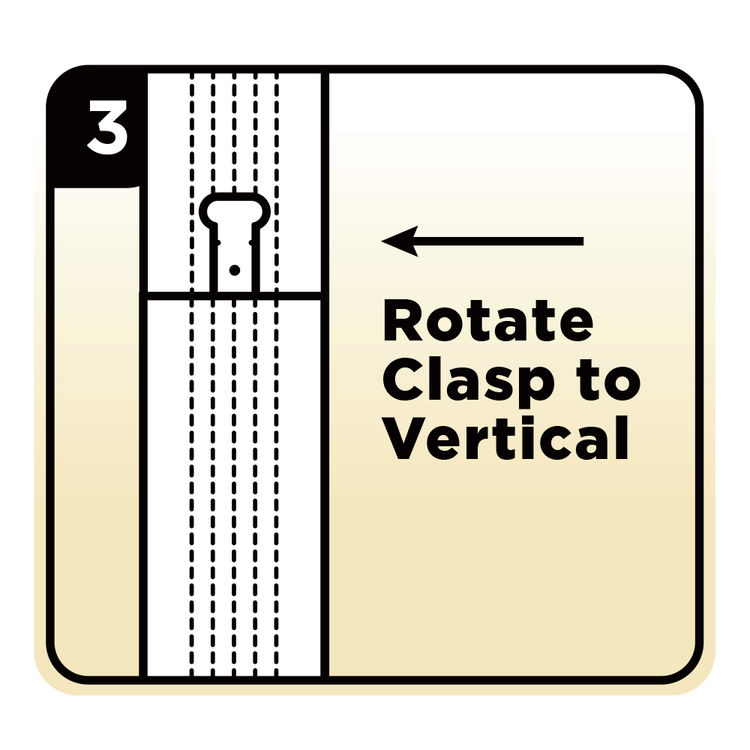
Step 3
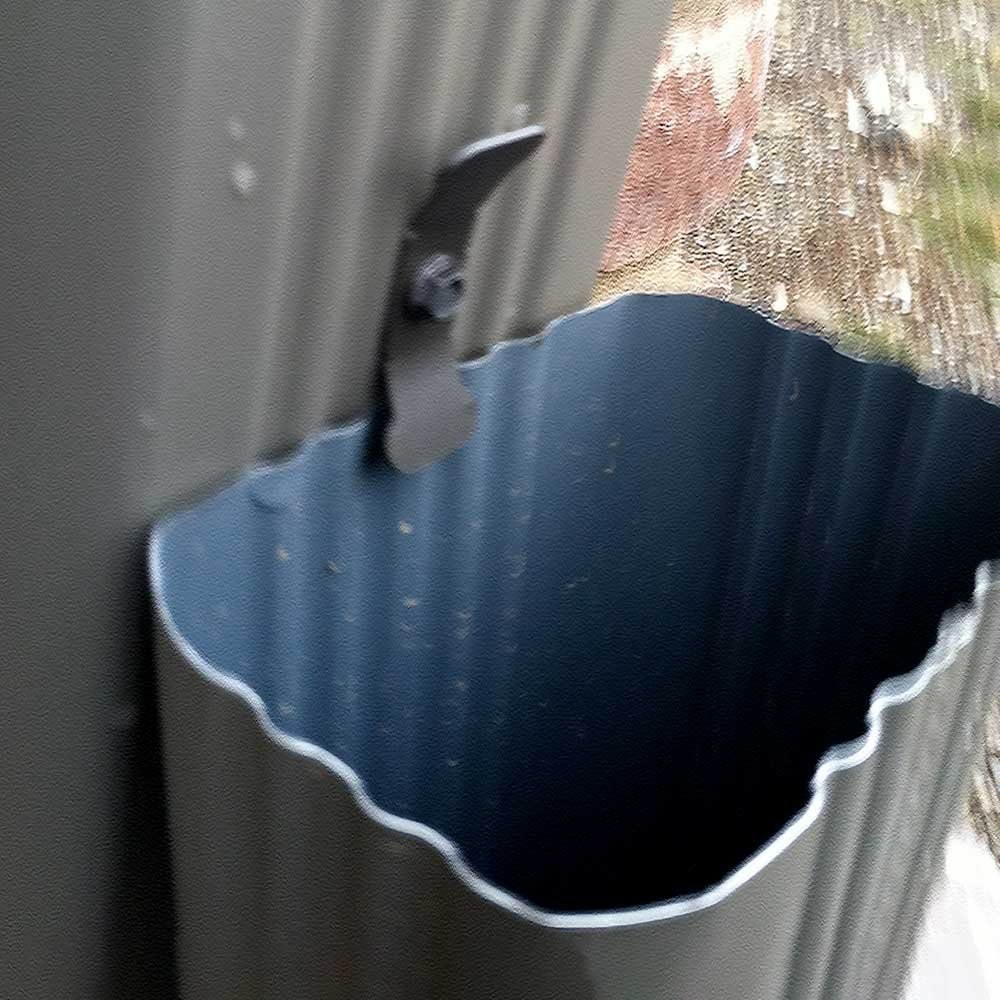
Rotate the clasp to a vertical position to hold the downspout extension upright.
1
2
3